
SATAFIRM S11 - How to Recover Lost Data - A Step by Step Guide
In this article, we will explore the data recovery process from a Kingston A400 480GB SSD with SATAFIRM S11 firmware error that stopped being recognized on the notebook, in a REAL case in our laboratory.
To do this, we will use a powerful and efficient tool to recover lost information on storage devices. We will provide a detailed step-by-step guide from detecting the error to recovering the desired data.
If you are facing data loss issues, this article is essential to help you understand the process of how to recover your valuable information.
SSD status
The SSD has stopped working and is now detected as SATAFIRM S11 by BIOS. Normally the SSD firmware is corrupted by degradation of NAND Flash memories.
Let's go to the process carried out for Data Recovery:
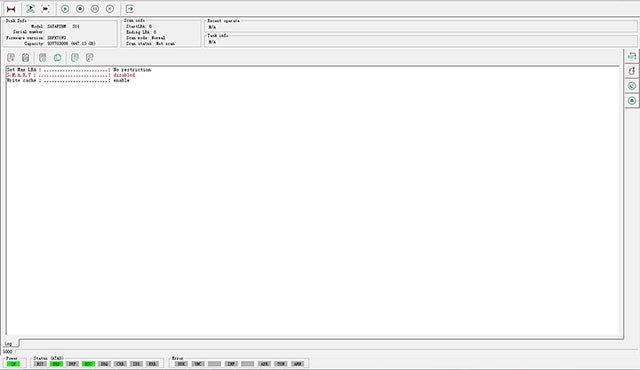
1 – Checking the problem, the Kingston SSD with corrupted firmware, incorrectly detecting - incorrect ID - SATAFIRM S11.
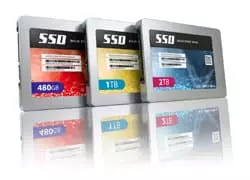
2 – Attempt to read sector 0 – LBA 0 kingston satafirm s11 ssd fix.
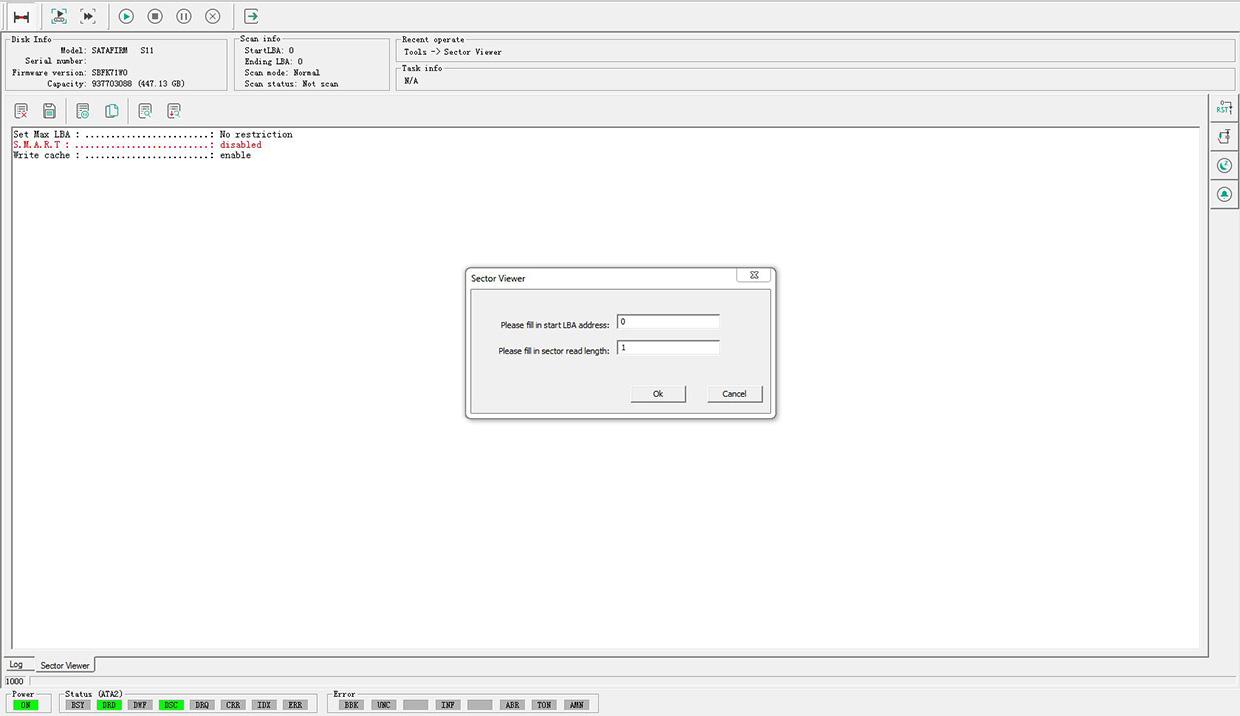
3 – Error when trying to read sector 0 - LBA 0. Wrong reading of the sector. The SSD cannot correctly access data.
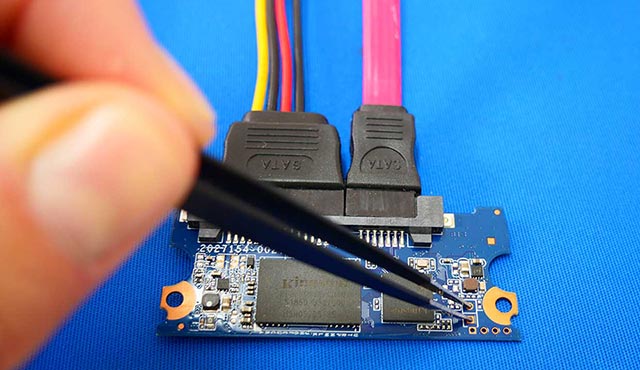
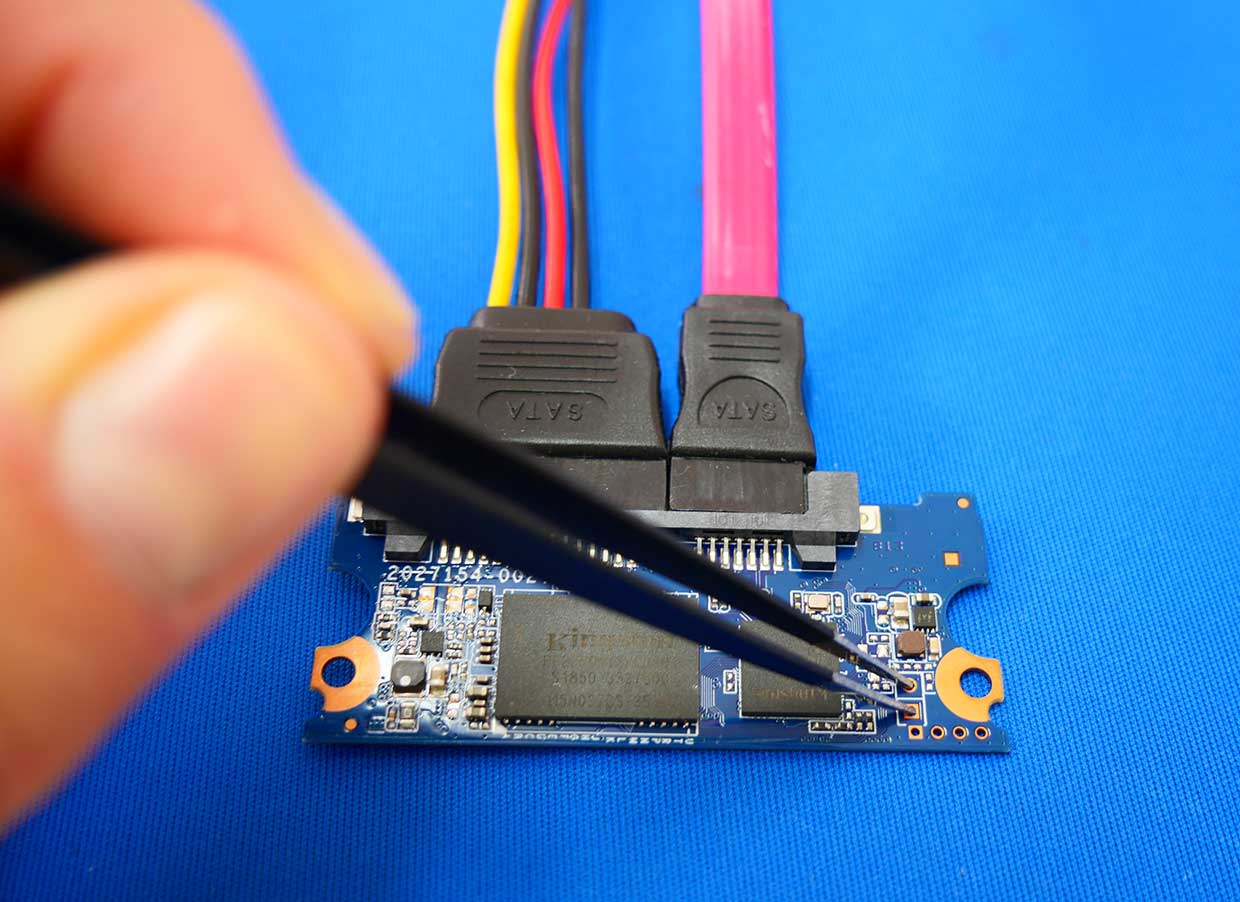
4 – To start the data recovery process, we will need to put the SSD in Safe Mode by short-circuiting the pins indicated in the image.
This will prevent the controller from loading the corrupted firmware and allow it to load the correct and intact Loader (firmware) into its memory.
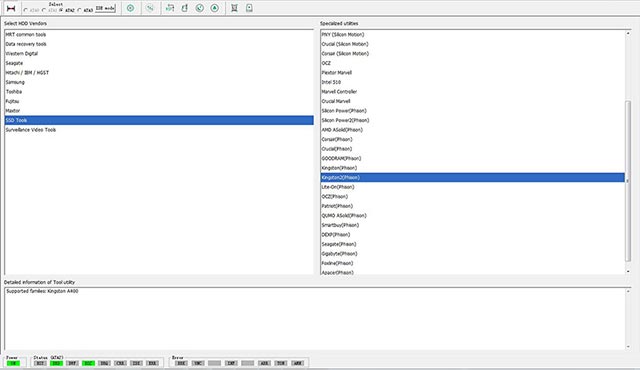
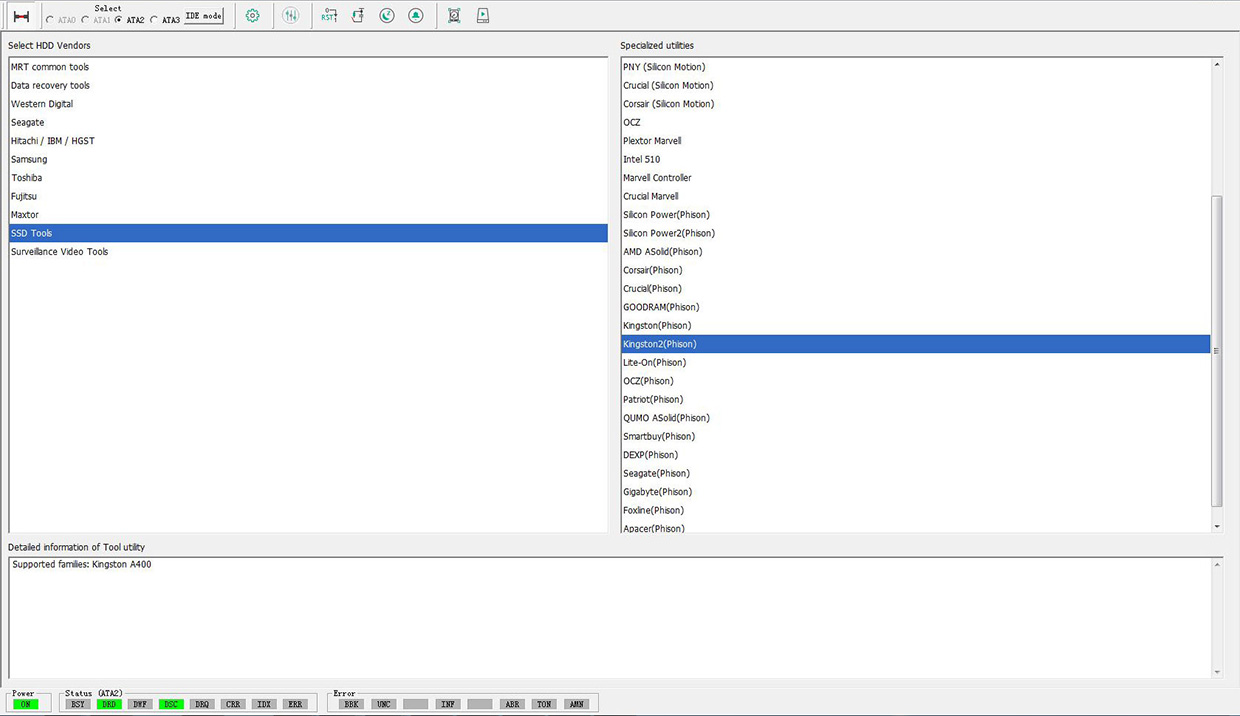
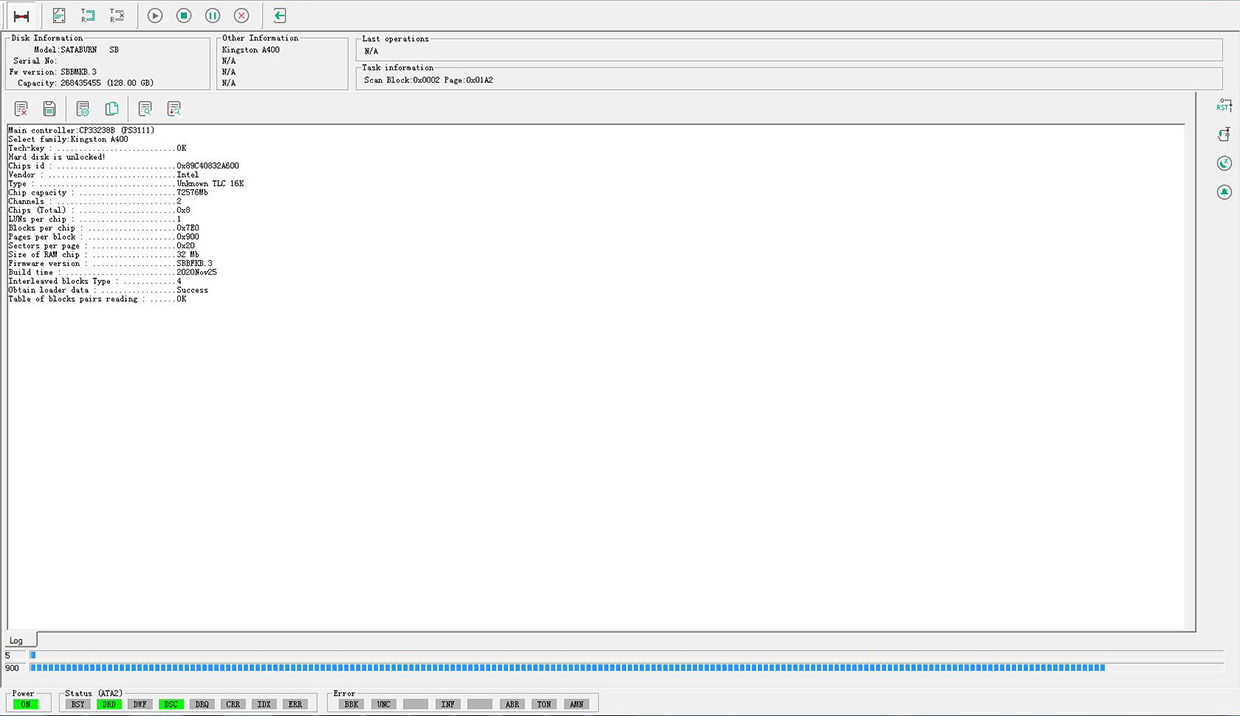
5 – Entering the SSD Utility, choosing Kingston 2 - Phison Controller - satafirm s11.
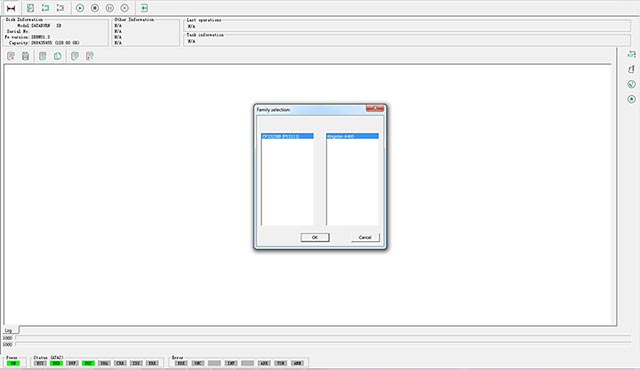
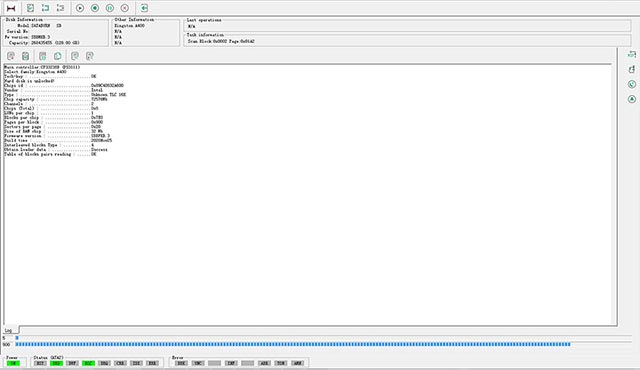
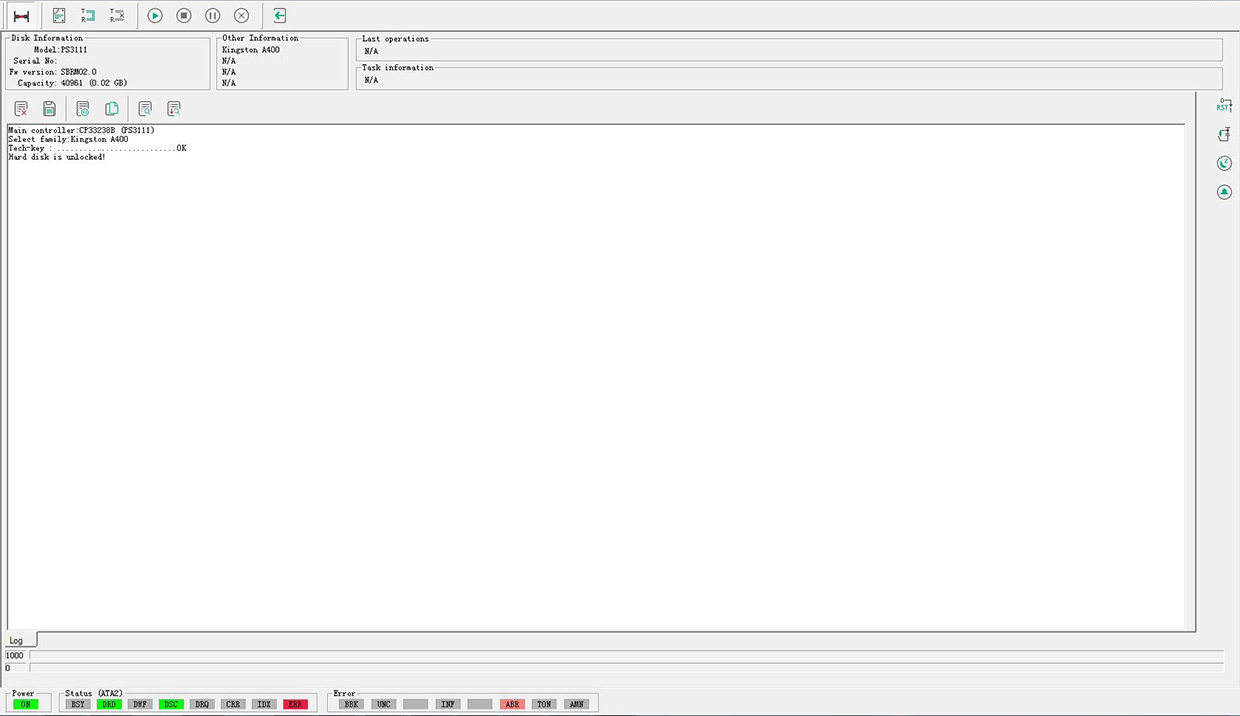
6 – Phison CP33238B (PS3111) Controller Detected - Kingston A400 family.
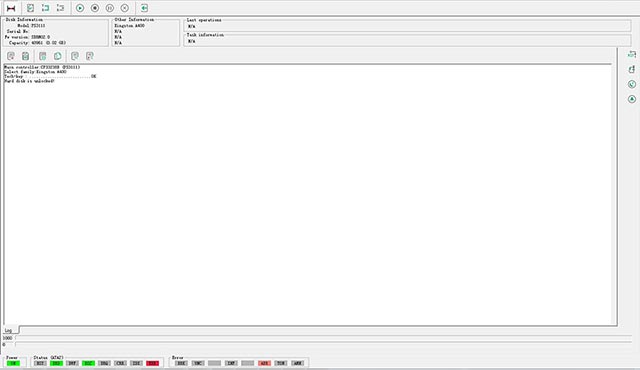
7 – The SSD has entered Safe Mode and is ready to receive the Loader.
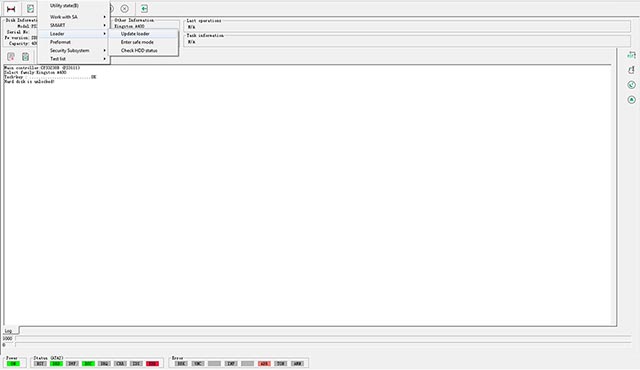
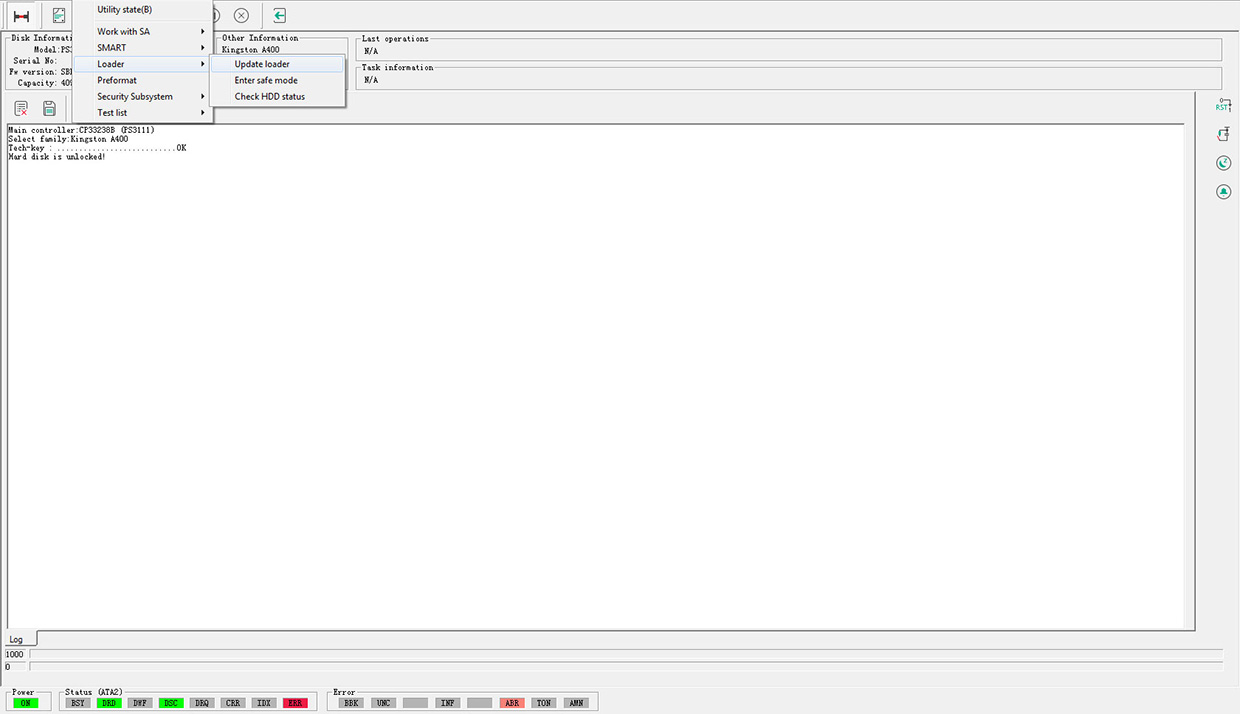
8 – Selected Loader - Update Loader - kingston ssd firmware.

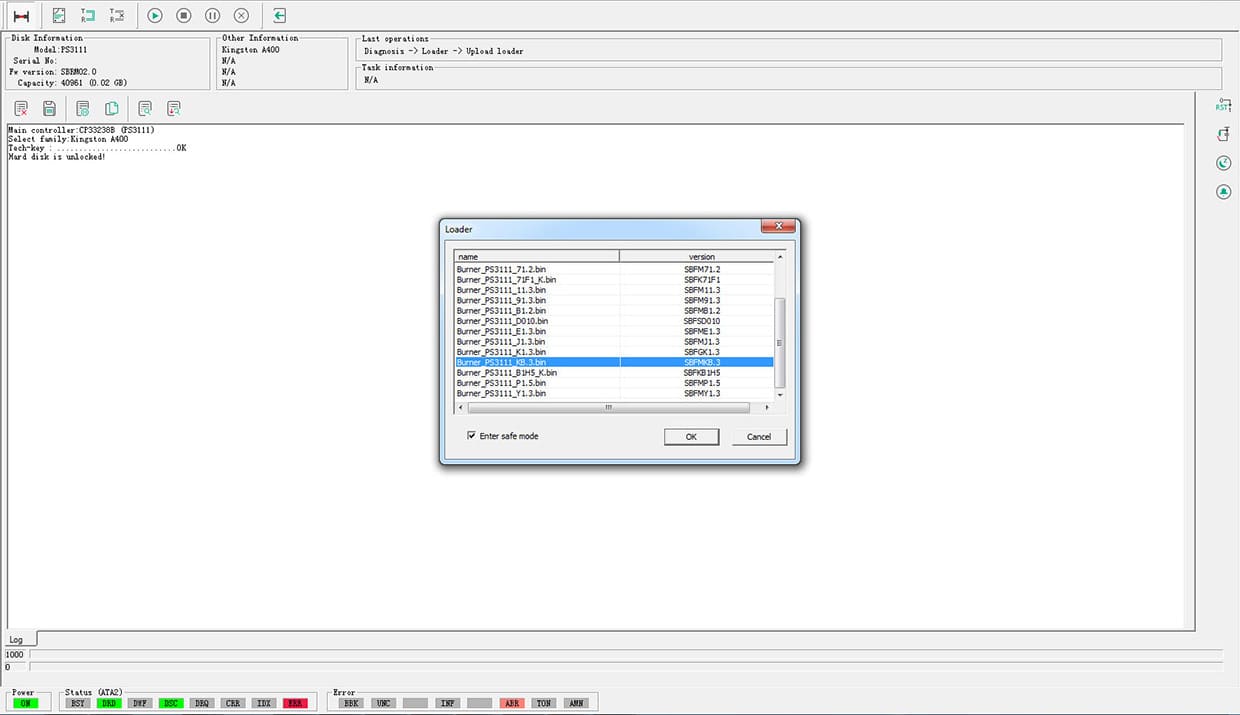
9 – Select the Loader corresponding to the SSD configuration.
10 – Loader being loaded into SSD memory and displaying the current configuration phison ps3111-s11-13.
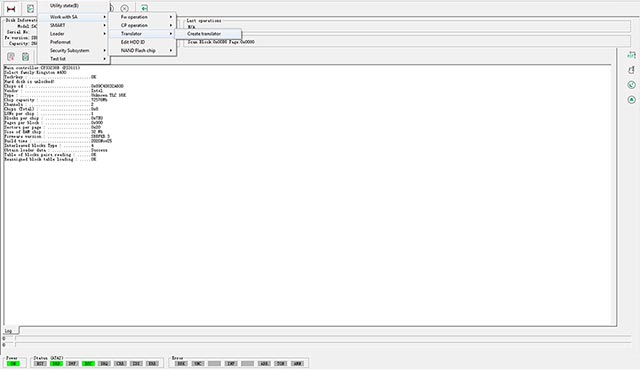
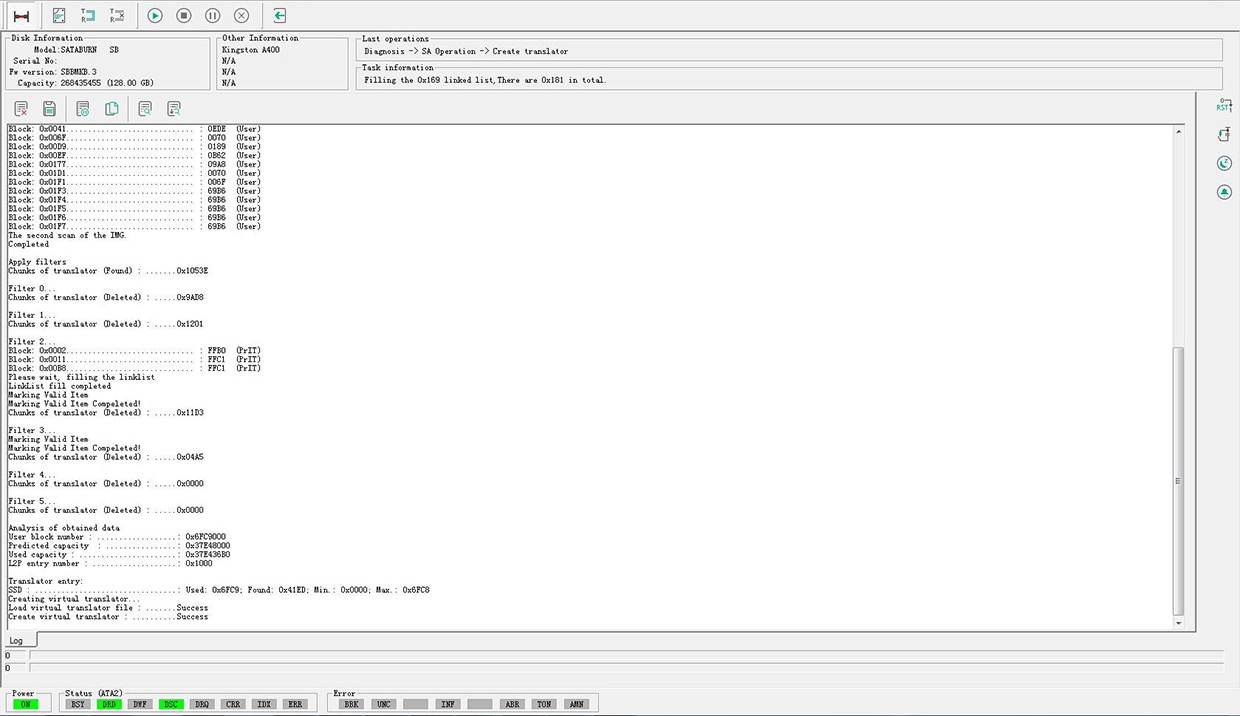
11 – After loading the Loader correctly, we begin the Translator creation process.
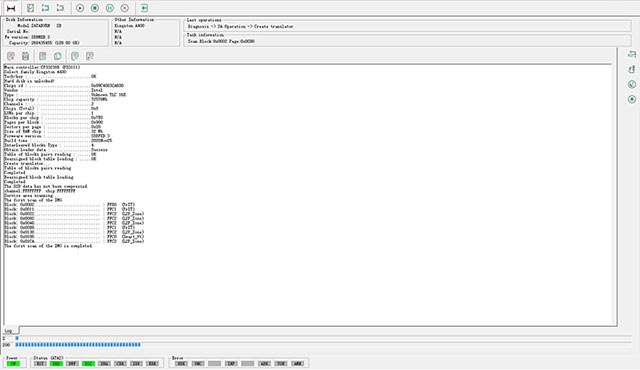
12 – Creation of the Translator in progress. It is a quite time-consuming process.

13 – Translator creation completed successfully.
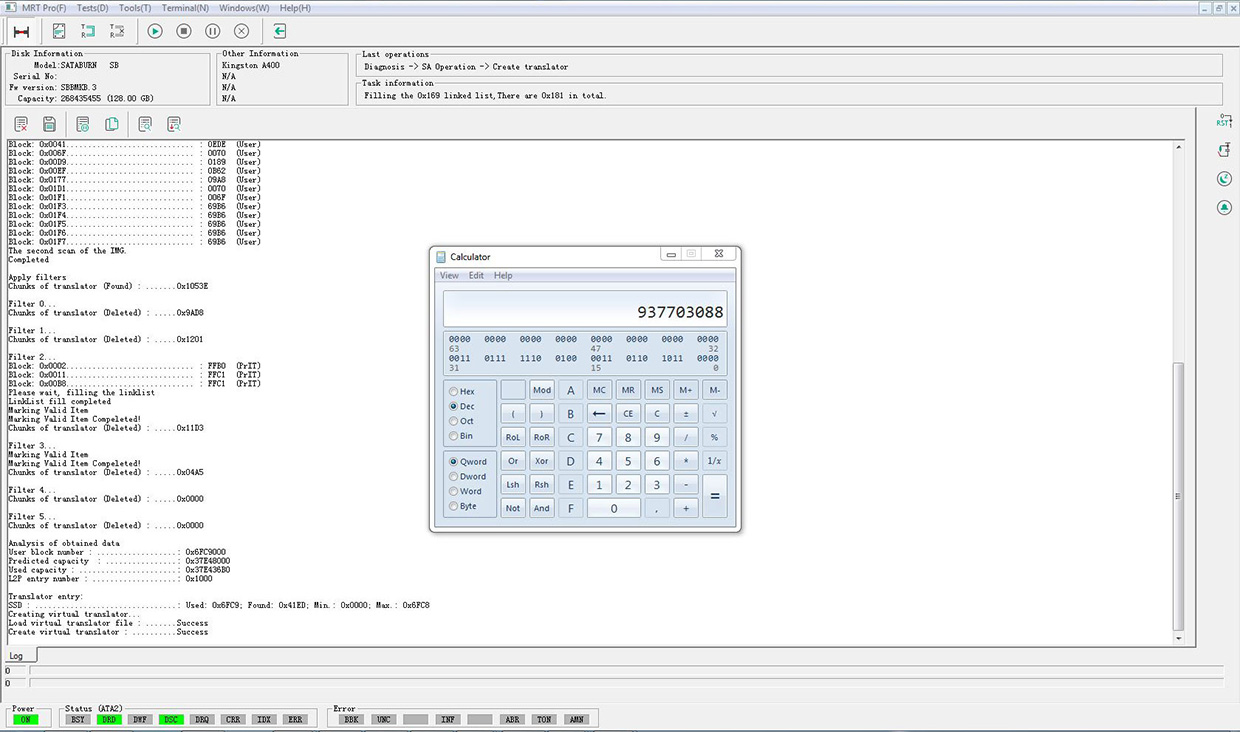
14 – The used capacity of SSD sectors (LBA) is calculated by converting the hexadecimal value into decimal (used capacity).
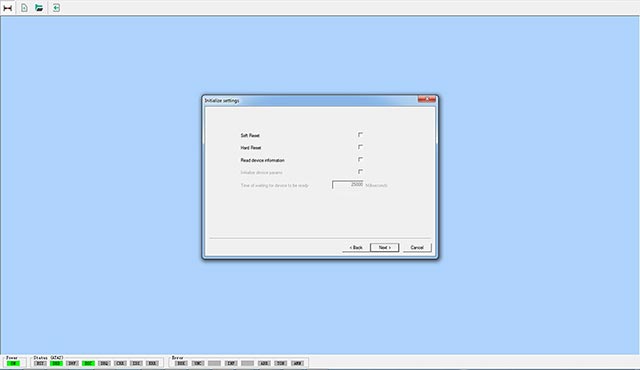
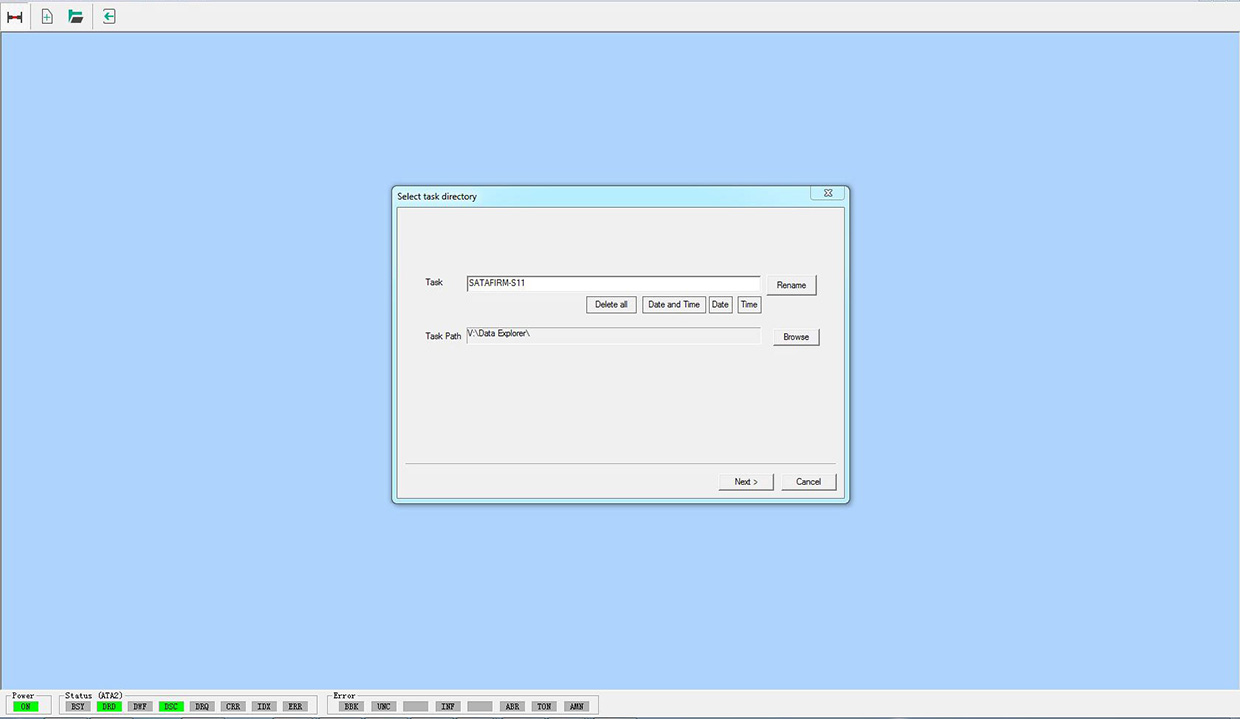
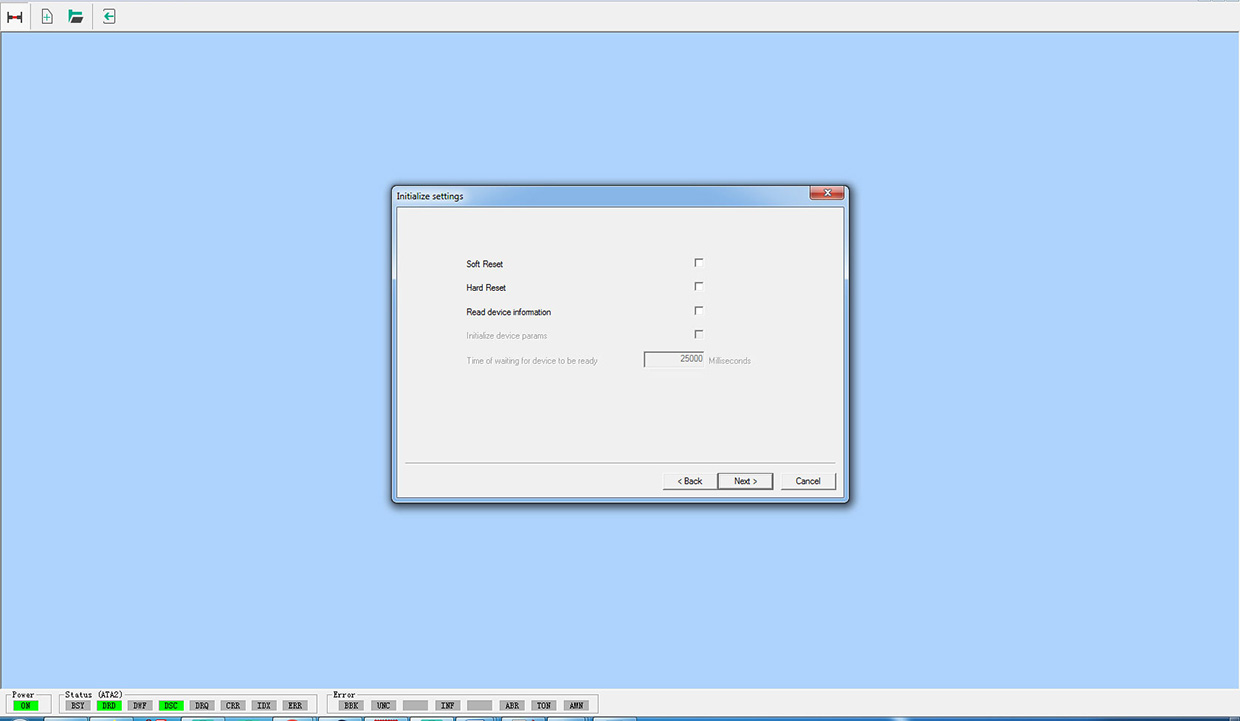
15 – After creating the Translator, we begin configuring the work environment in DataExplorer.
16 – The Read device information option is left unselected so that we can manually enter the maximum LBA (Logical Block Address) of the SSD. This helps us avoid the detection of an incorrect LBA value.
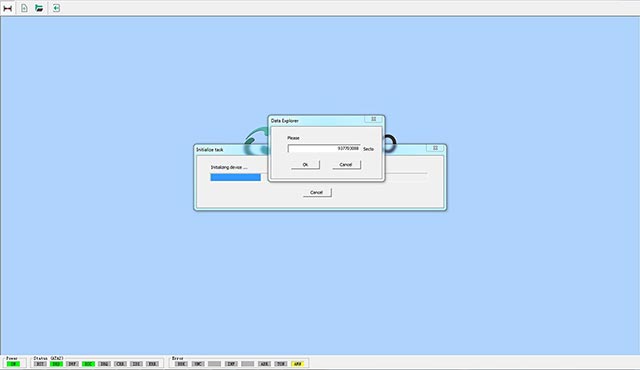
17 – We insert the previously calculated value 937703088 of the maximum SSD LBA.
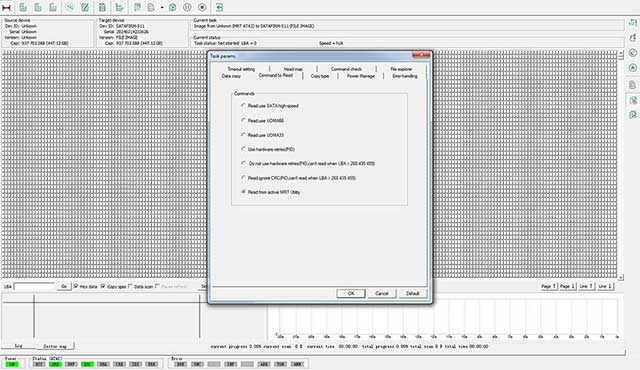
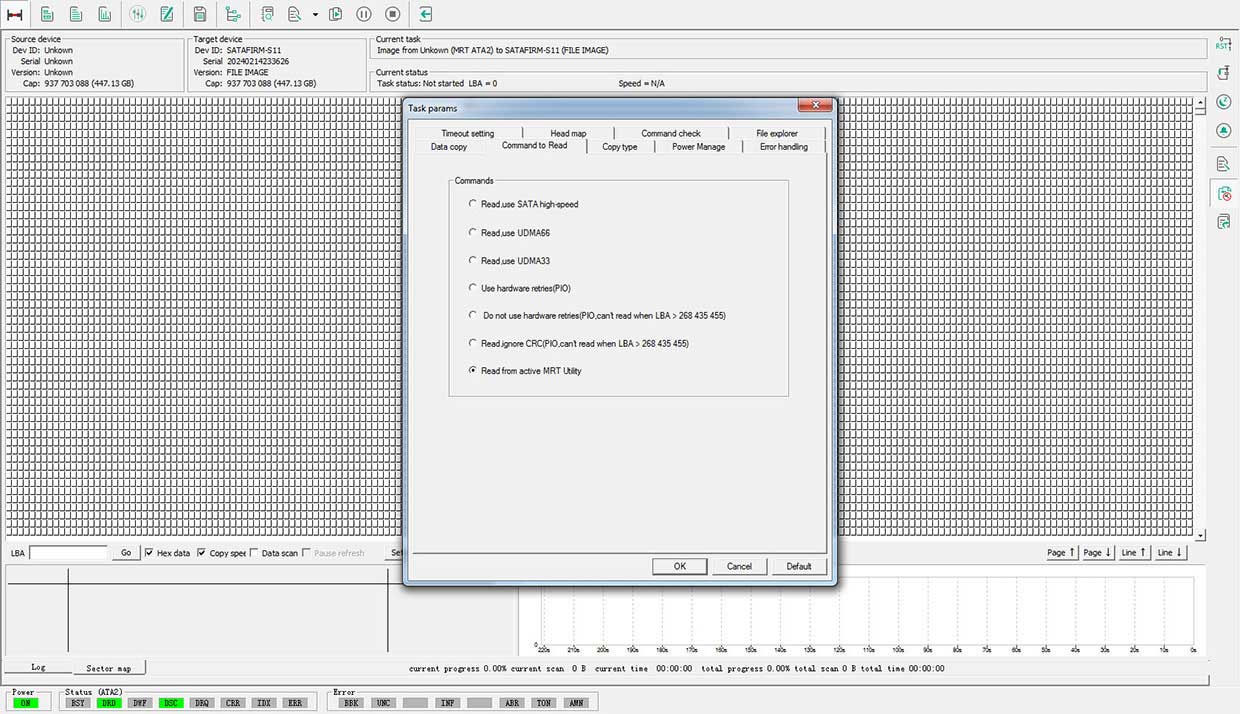
18 – We configure reading through the utility so that the Translator is loaded and used for scanning, allowing the data to be accessed correctly.
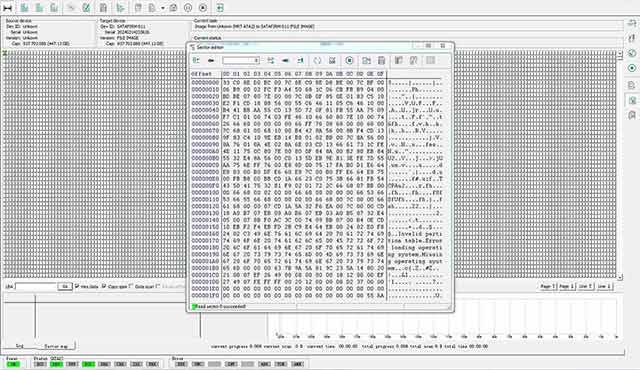
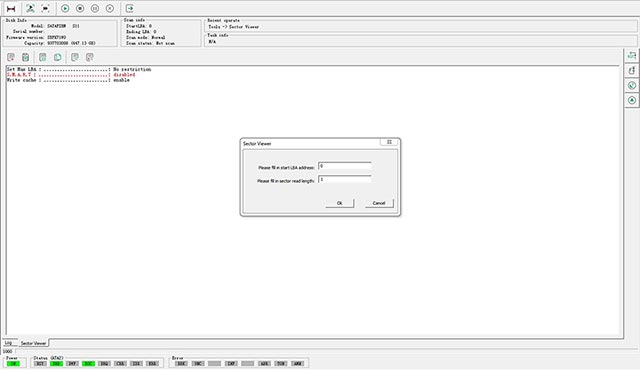
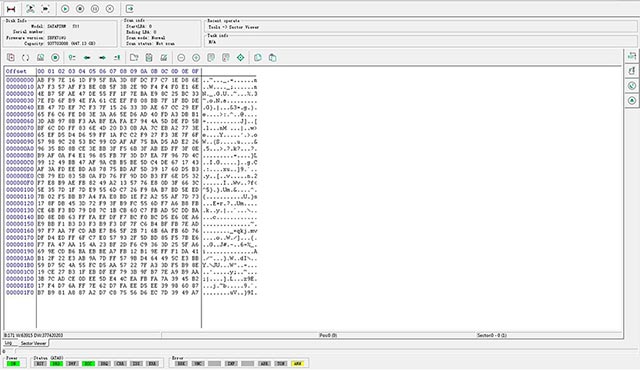
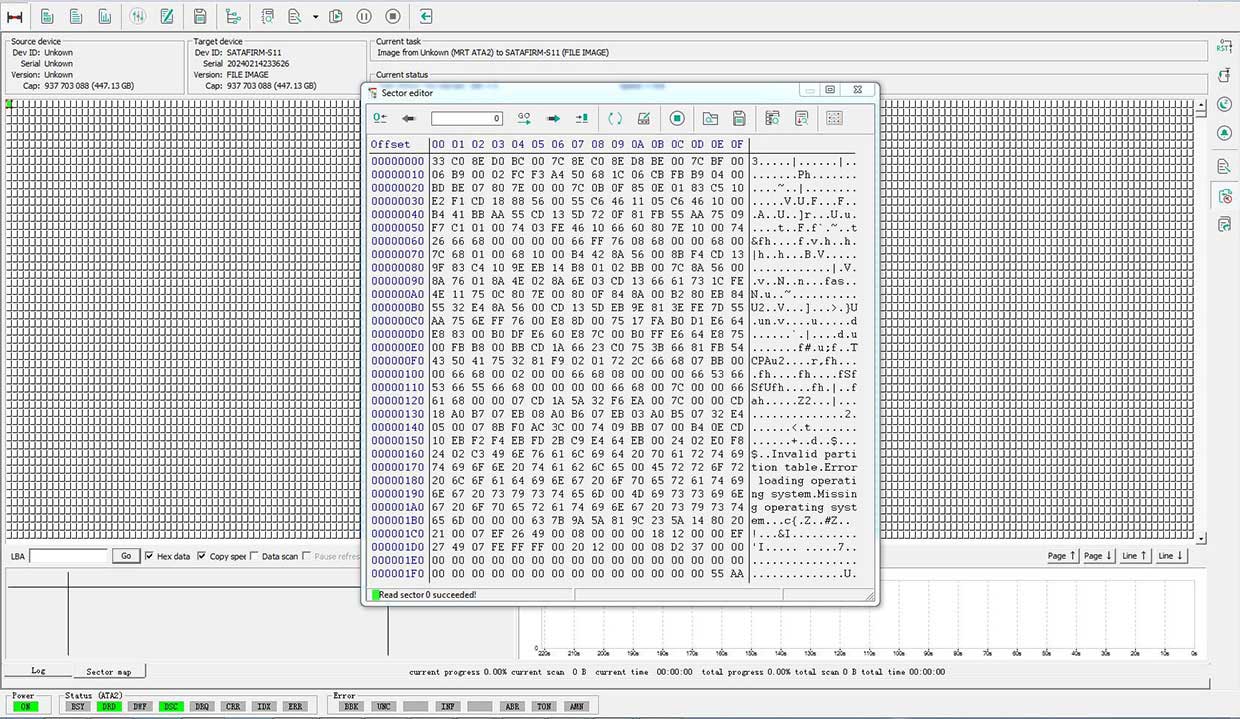
19 – After everything is configured, we do a reading test of sector 0 - LBA 0 and confirm that everything is okay by checking the 55 AA signature at the end of the sector. This confirms the correct reading of the sector and that the data is being read correctly.
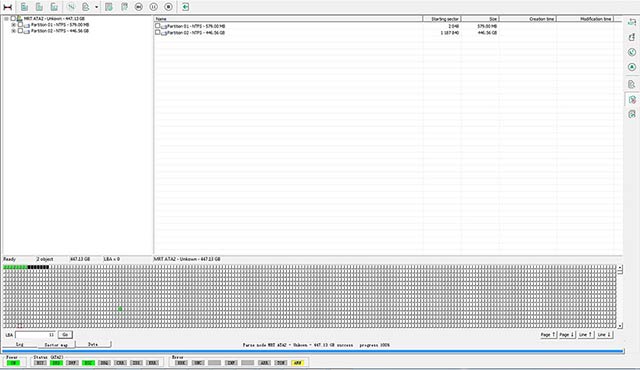
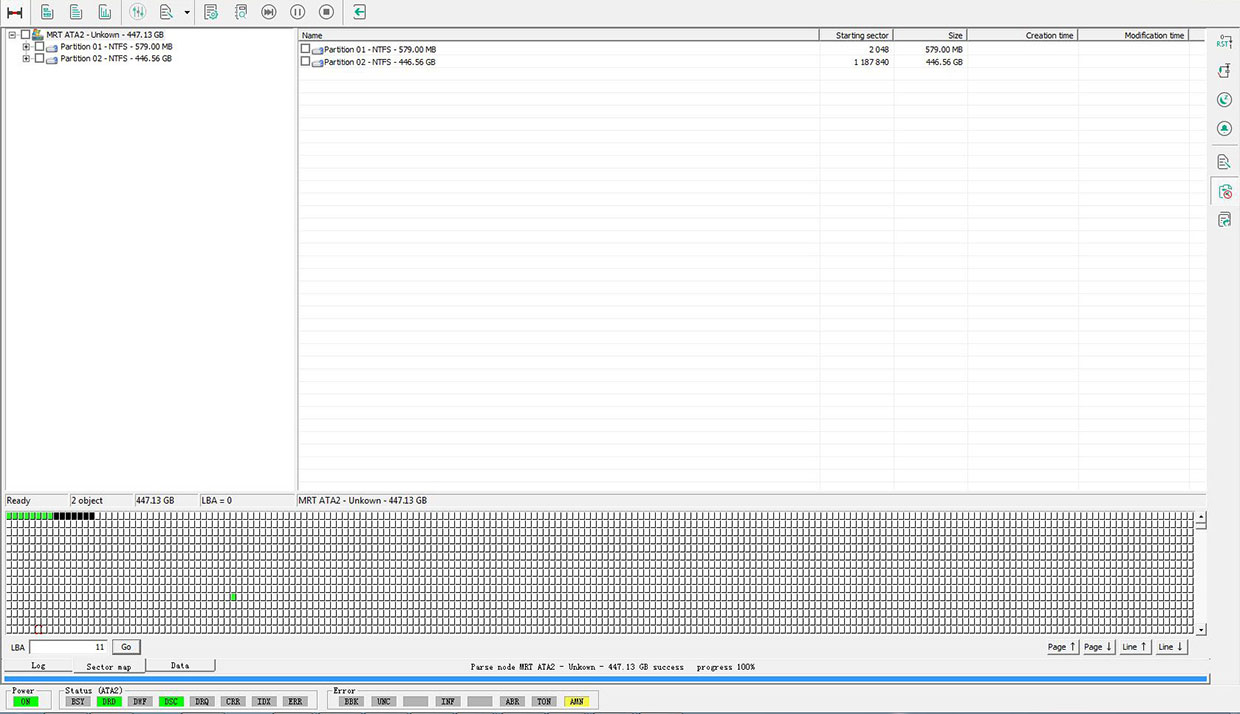
20 – At this point, the partitions are already visible, and the file scanning process, which is the focus of data recovery, can be started. Note any damaged sectors (black squares) indicating memory degradation problems.
Important informations:
- The procedure was carried out on professional equipment specially designed to deal with critical SSD situations, with the sole objective of recovering the data and not repairing the SSD. At the end of the process, after data recovery, the SSD returns to its original error state, not being detected, since the entire SSD firmware loading process was carried out in its memory.
- If you have an SSD in a similar condition, with corrupted firmware, DO NOT attempt to use software downloaded from the internet to access the data. The less time the SSD remains on, the greater the chances of data recovery, as its memories degrade quickly when they begin to fail.
- Do not attempt to rewrite the SSD firmware as this will erase the contents of the NAND Flash memories, making data recovery impossible.
- Do not attempt to reuse an SSD that has had its firmware corrupted due to memory degradation.
- This content is for informational purposes only, and we do not assume any responsibility for the inappropriate use of the information contained herein.


